TWRP 101: How to Install a Custom ROM
Since Android is an open source operating system, that means anyone with a little know-how can download, view, and even alter its underlying code base. Manufacturers do it all the time, which is how we end up with skins like TouchWiz and Sense. But when Android's awesome third-party development community gets their hands on this code, we end up with custom ROMs like LineageOS and MIUI.Using TWRP, custom ROMs can be installed in place of a device's stock firmware to bring in new features and customization options — but as you would imagine, this can be a dangerous process if everything isn't done just right. So to help ensure that your custom ROM install goes off without a hitch, I'll go over the entire process in great detail below.Don't Miss: How to Install TWRP — The Best Custom Recovery for Android
RequirementsTWRP Custom Recovery installed Any important data backed up to a separate storage device
Step 1: Find Your Model Number & CPU TypeWhen flashing a custom ROM, you need to be absolutely certain that you're downloading the right files for your particular device and model number. For this reason, I'd recommend installing an app called Droid Hardware Info to learn some basic information about your device's hardware.Install Droid Hardware Info for free from the Google Play Store Once you've installed the app, simply run it and head to the Device tab, then make note of the "Model" entry. This information will be used to make sure you're downloading the proper ROM for your particular device.Next, you'll need to know your device's processor type, and with modern Android devices, there are only three options—ARM, ARM64, and x86. So in the System tab, take note of two fields—"CPU Architecture" and "Instruction Sets." From there, match up the information shown in these categories with the list below to find your device's processor type:ARM: ARMv7 or armeabi ARM64: AArch64 or arm64 x86: x86 or x86abi
Step 2: Download the Necessary FilesNow that you know your device's name, model, and CPU type, it should be relatively easy to download the right ROM files for your phone or tablet. When downloading the following files, make sure that they're all saved on your device's internal storage or SD card before moving on to the next step.
Custom ROM (Required)First up, you'll need to download a copy of the custom ROM that you'd like to install. When downloading the ROM, make sure any model number or device name listed on the download page match up with the information you found in Droid Info. Beyond that, you may want to know of some good places to find custom ROMs, so I'll list some common resources below:XDA Developers forum LineageOS download page (formerly CyanogenMod) MIUI download page SlimROM download page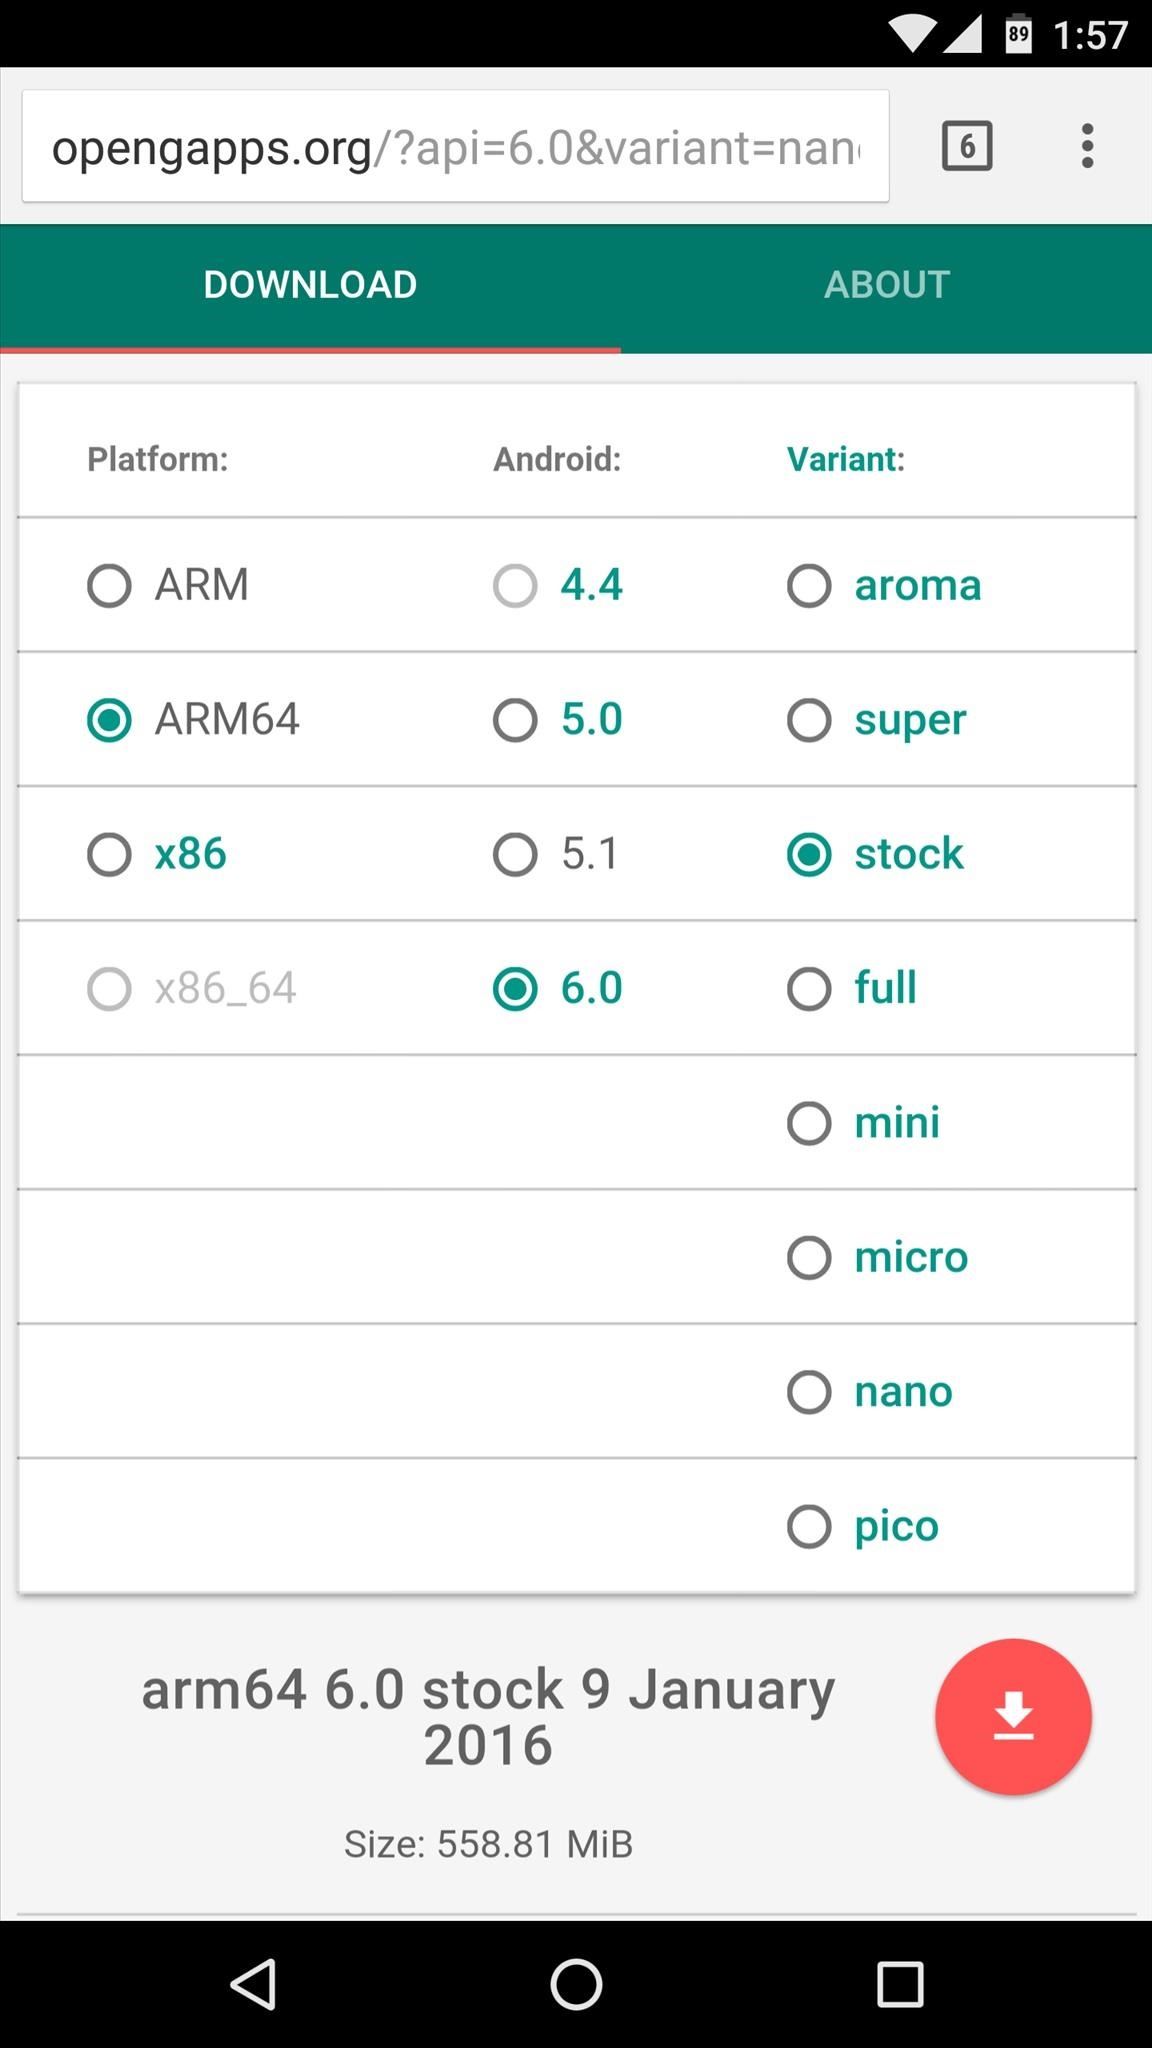
Gapps (Recommended)The vast majority of custom ROMs will not include all of Google's apps and services by default. This means that if you'd like to continue using the Google Play Store and other similar services, you'll also have to download and install an addon package called Gapps.Getting the right Gapps package can be tricky, but a new project called Open Gapps can help quite a bit. Simply head to the link below, then select your processor type from the list and choose the Android version for your custom ROM. From there, you can opt to download one of several different Gapps packages, but if you're not sure about this part, I'd suggest that you simply download the "Stock" Gapps package.Download a Gapps package from Open Gapps
Custom Kernel (Optional)While you're in the process of flashing stuff, you may also want to install a custom kernel. Custom kernels can bring added features like the ability to overclock your processor, tweak your display coloring, or enable double-tap-to-wake functionality.Custom kernels can generally be found under the "Android Development" section of your device's XDA Developers forum, but read carefully before downloading, because some custom kernels are not compatible with certain custom ROMs.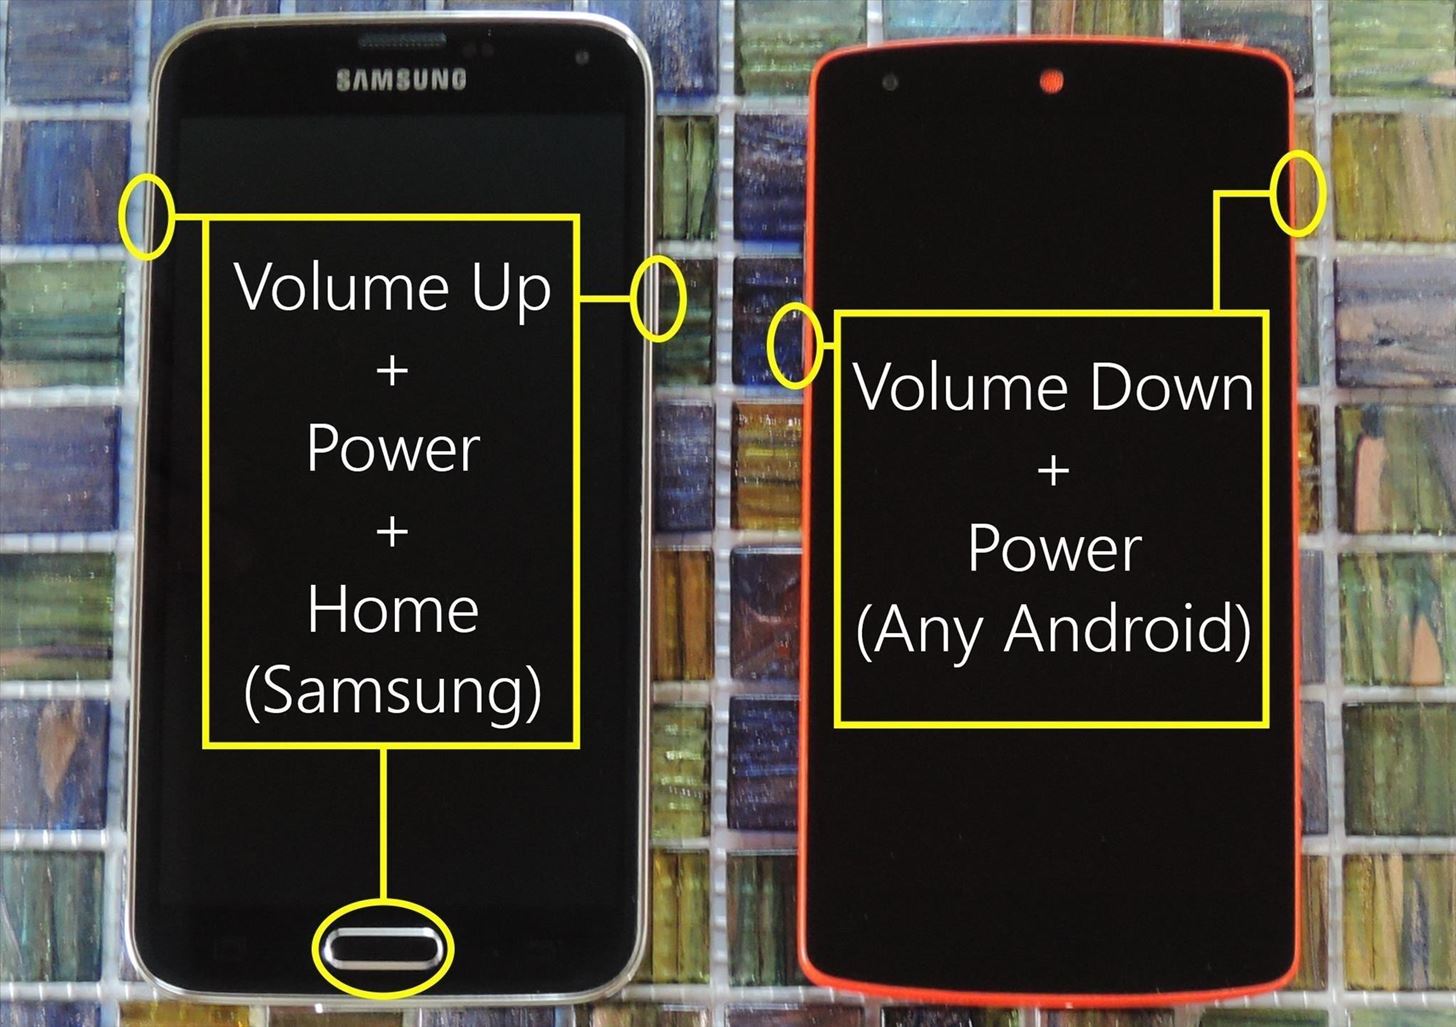
Step 3: Boot into Custom RecoveryOnce you've got all of the necessary files saved to your device's internal storage or SD card, the next thing you'll need to do is boot into custom recovery. So to start, power your device completely off.From here, if you're using a Samsung device, press and hold the volume down, power, and home buttons simultaneously, then your device will boot directly into custom recovery. Otherwise, for most other Android devices, press and hold the volume down and power buttons simultaneously. Next, if you're using a non-Samsung device, you'll see Android's bootloader menu. From here, press the volume down button twice to highlight the "Recovery mode" option, then press the power button to select it.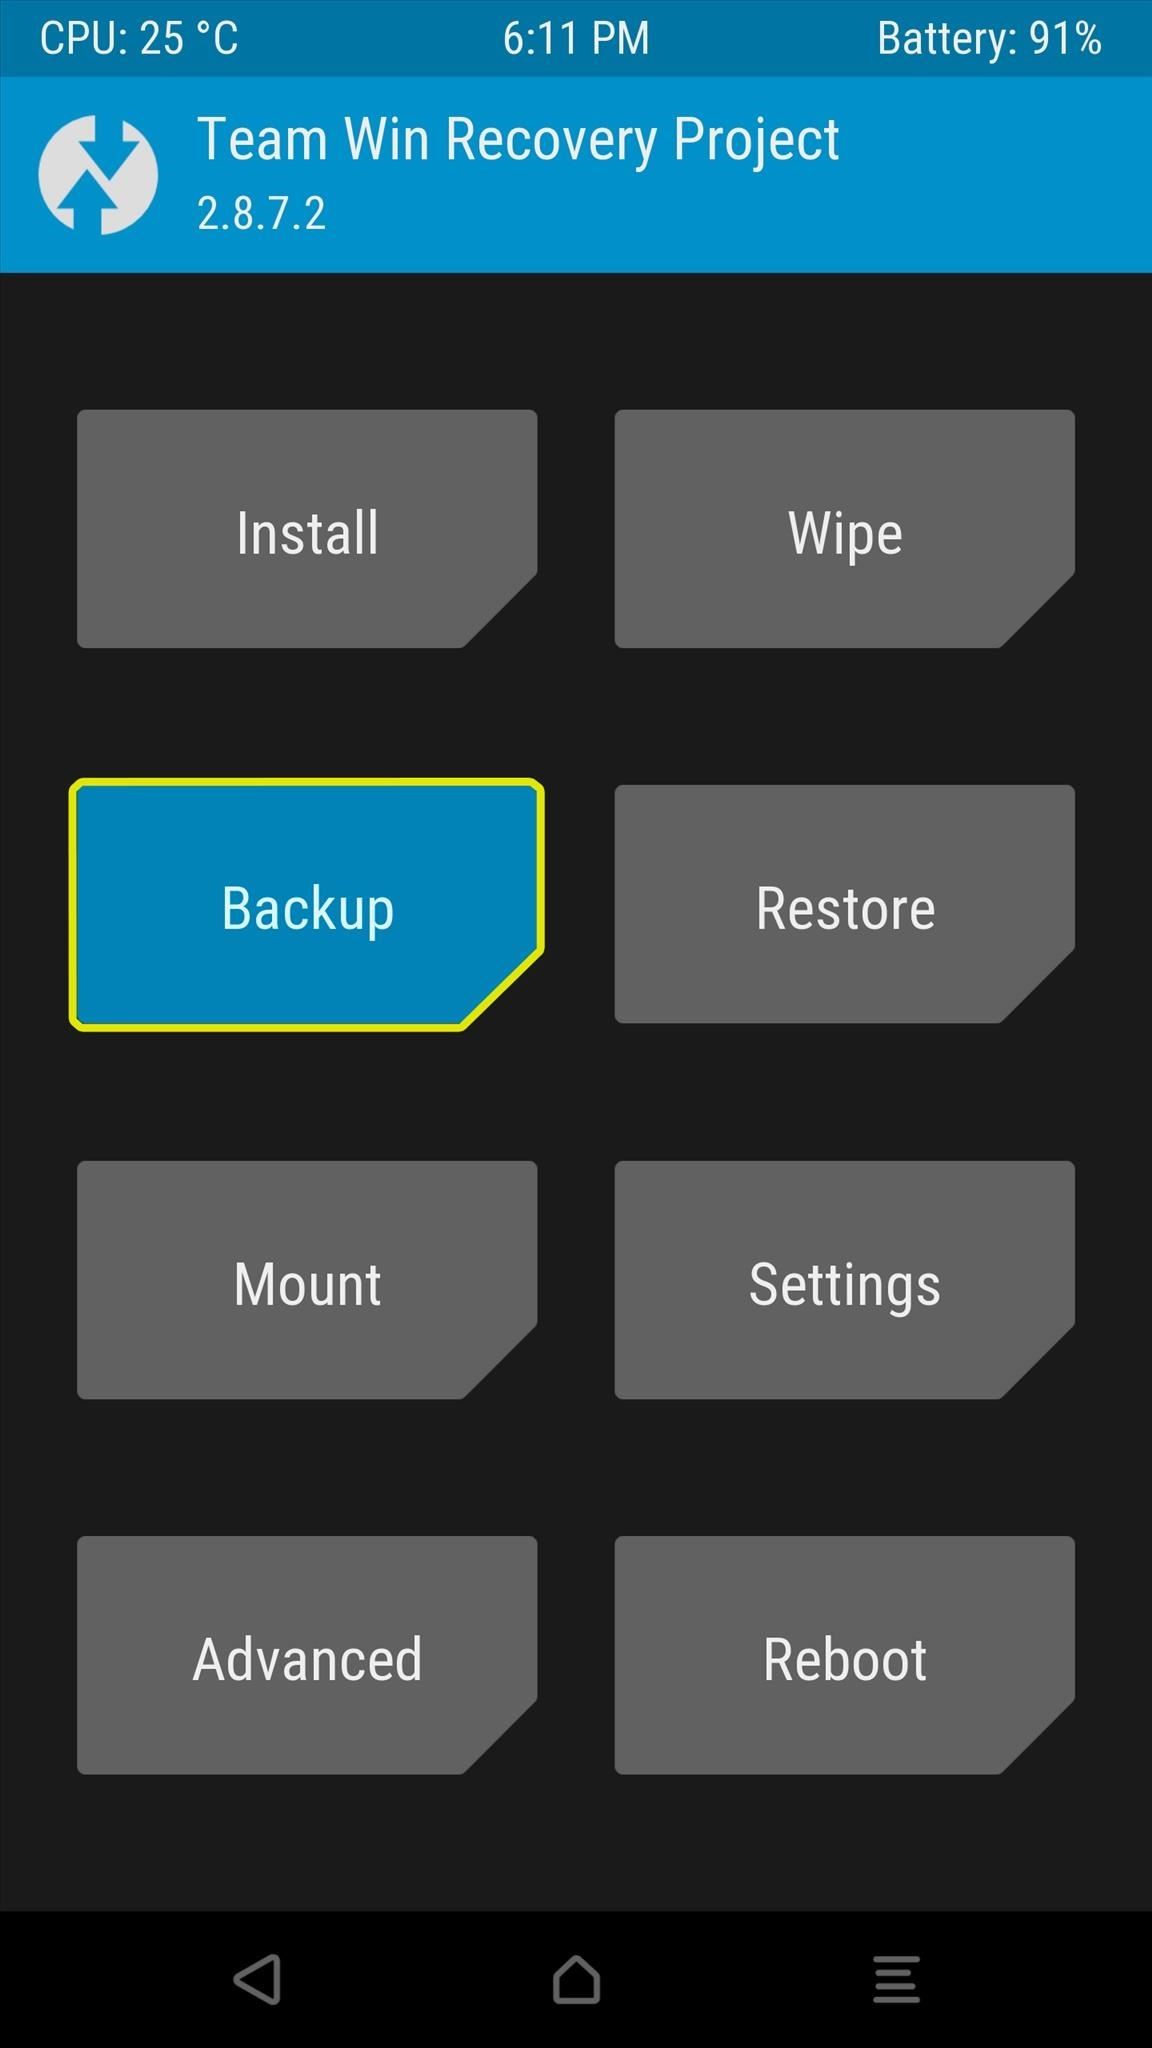
Step 4: Make a NANDroid BackupOnce you've made it into custom recovery, the first thing you should do is create a NANDroid backup, which will ensure that you have a carbon copy of your current operating system as a fallback plan in case anything goes wrong with your custom ROM.So from TWRP's main menu, tap the "Backup" button, then leave everything selected exactly as it is, and swipe the slider at the bottom of the screen to create a NANDroid backup. The process will take up to 15 minutes, but when it's finished, tap the home button at the bottom of the screen to head back out to the main menu.
Things to Look Out for in Step 4If you've altered the default selections in the past, make sure "System," "Boot," and "Data" are selected at the very least. NANDroid backups require a lot of storage space, so you may need to delete files to make room.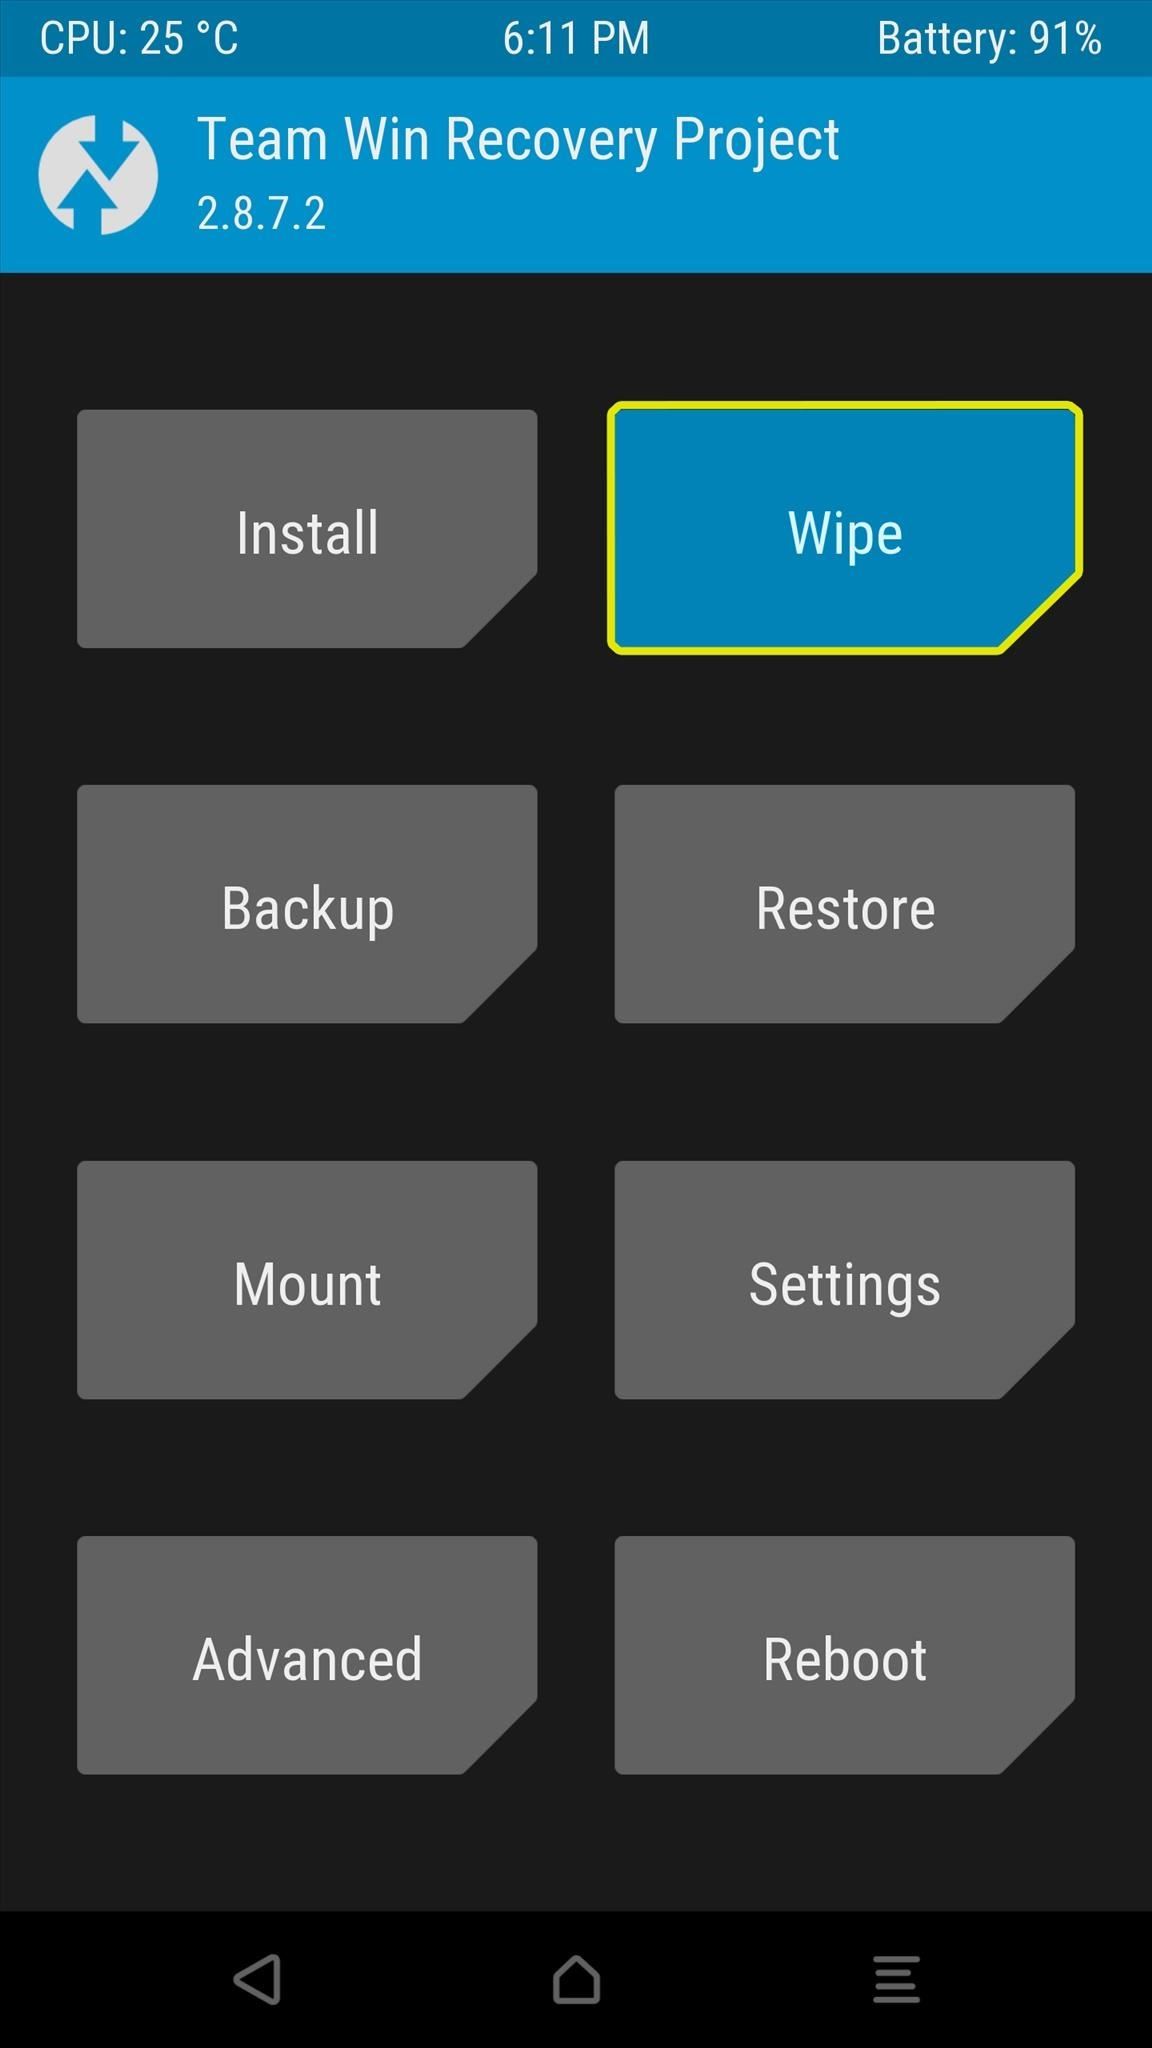
Step 5: Perform a Full System WipeNext, you'll need to completely remove your existing operating system and all of its files to make sure that there are no conflicts with the new custom ROM you're about to install.From TWRP's main menu, tap the "Wipe" button, then select "Advanced Wipe" from the following screen. From here, tick the boxes next to the Dalvik Cache, System, Data, and Cache options, then swipe the slider at the bottom of the screen. Once this process is finished, tap the home button at the bottom of the screen to head back out to the main menu.
Things to Look Out for in Step 5Don't wipe your device unless you're sure you made a successful NANDroid backup beforehand. DO NOT select "SD Card" or "Internal Storage" from the Advanced Wipe menu, as this will delete your ROM file and leave you without an OS.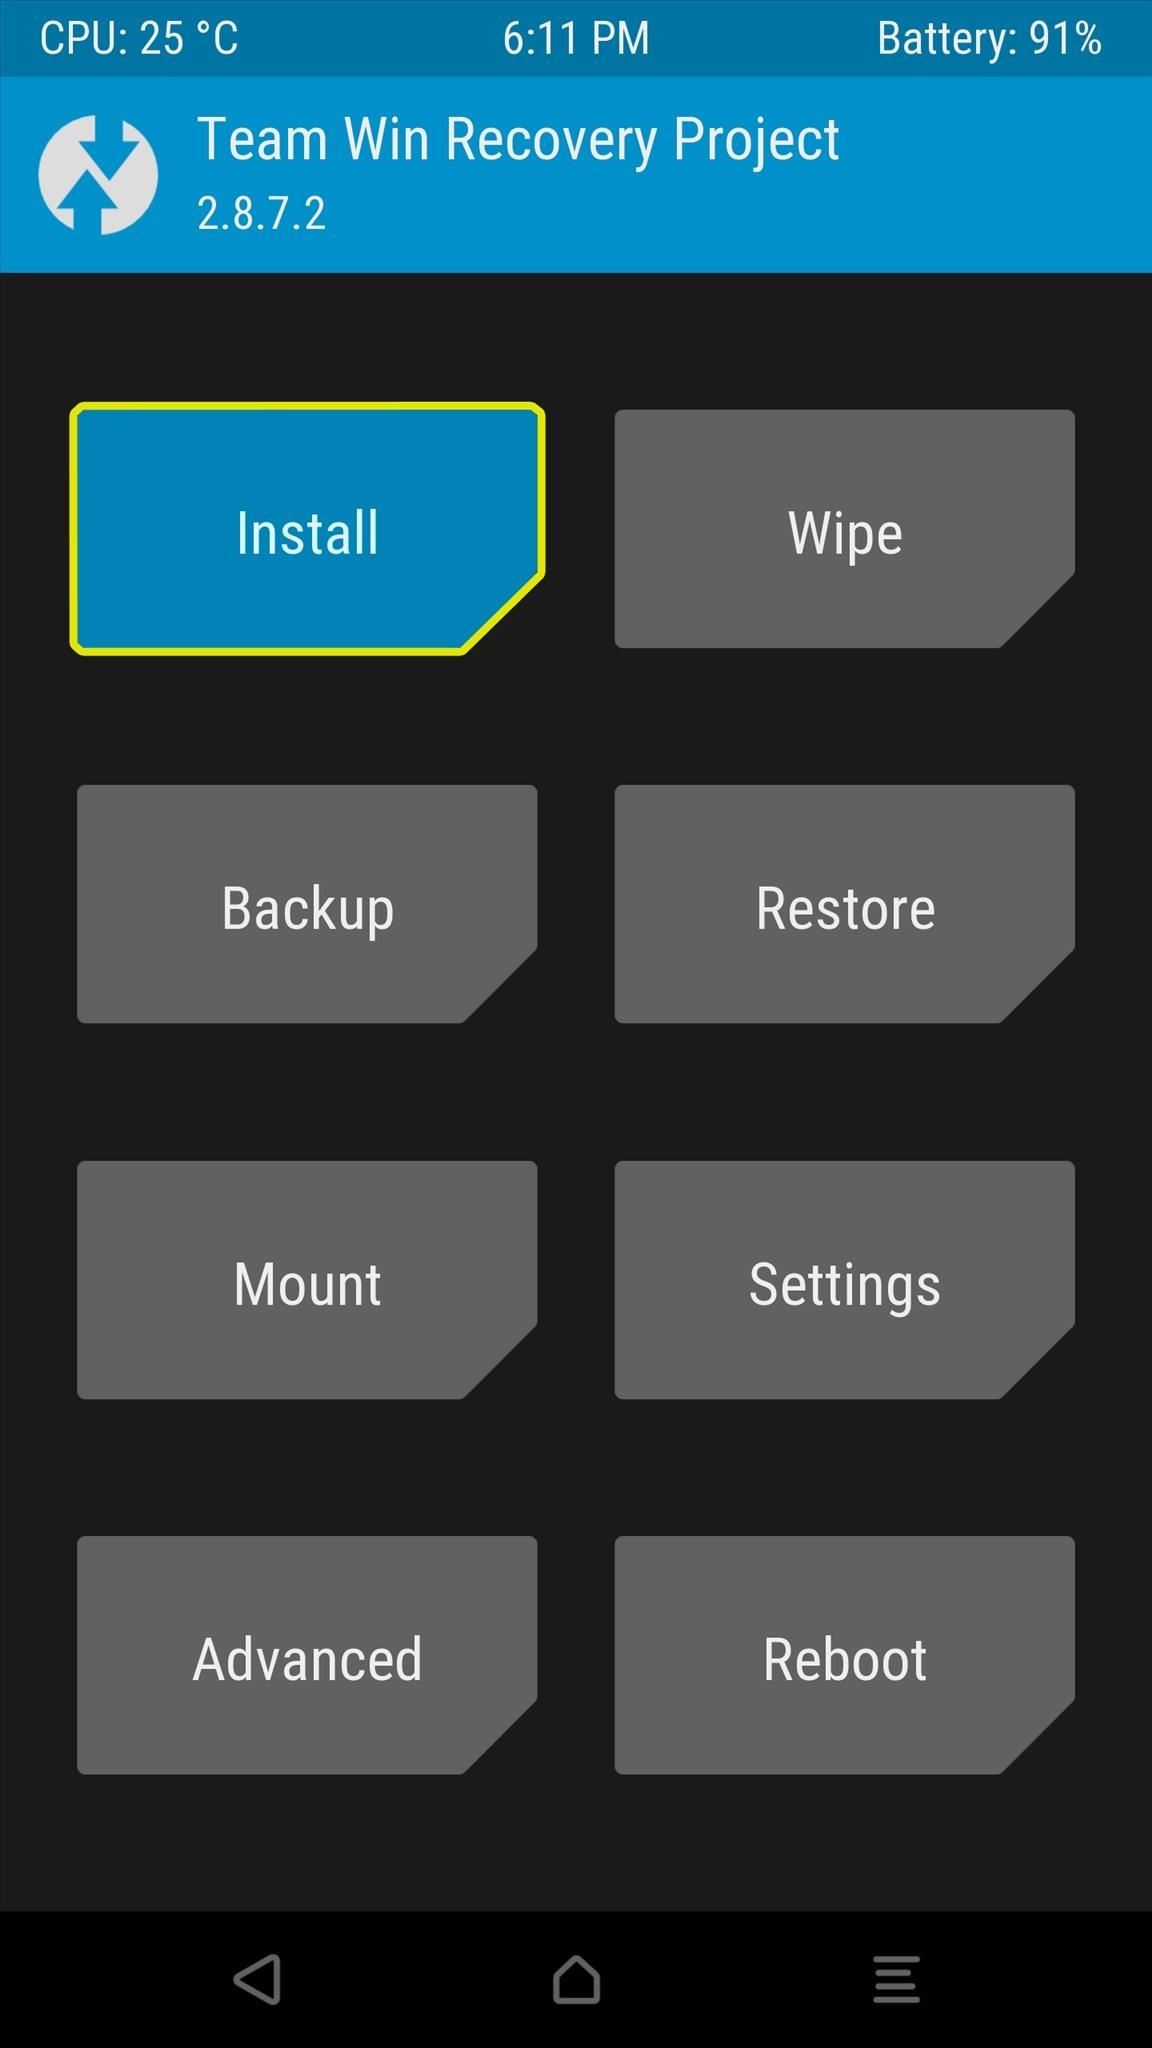
Step 6: Install the ROMAt this point, you're finally ready to flash the custom ROM. From TWRP's main menu, tap the "Install" button, then navigate to your device's Download folder and select the ROM file that you downloaded earlier. Next, simply swipe the slider at the bottom of the screen to initiate the ROM installation. At this point, if your ROM includes an Aroma Installer interface, you'll see a graphical, touch-based UI that guides you the process of customizing certain options. Otherwise, you'll see a wall of text scrolling by as TWRP installs your custom ROM.When the process is finished, you have two options. If you're only installing a custom ROM and do not plan on flashing a Gapps package or custom kernel, you can simply tap the "Reboot System" button and skip ahead to Step 9. Otherwise, if you're flashing any additional ZIPs today, simply tap the back button to head out to TWRP's "Install Zip" menu and read on below.
Things to Look Out for in Step 6To be on the safe side, either connect your phone to a charger or verify that it has at least 20% battery life remaining before flashing a ROM. ROM file names can be tricky, so read carefully and make sure you're flashing the right ZIP. Make sure to flash the base ROM file before flashing any addons like Gapps or a custom kernel (see Steps 7 and 8 below). If you'd like to save some time, you can use the "Add More ZIPs" function to select the Gapps and kernel ZIPs (in any order), but only do this after you've selected the initial ROM file.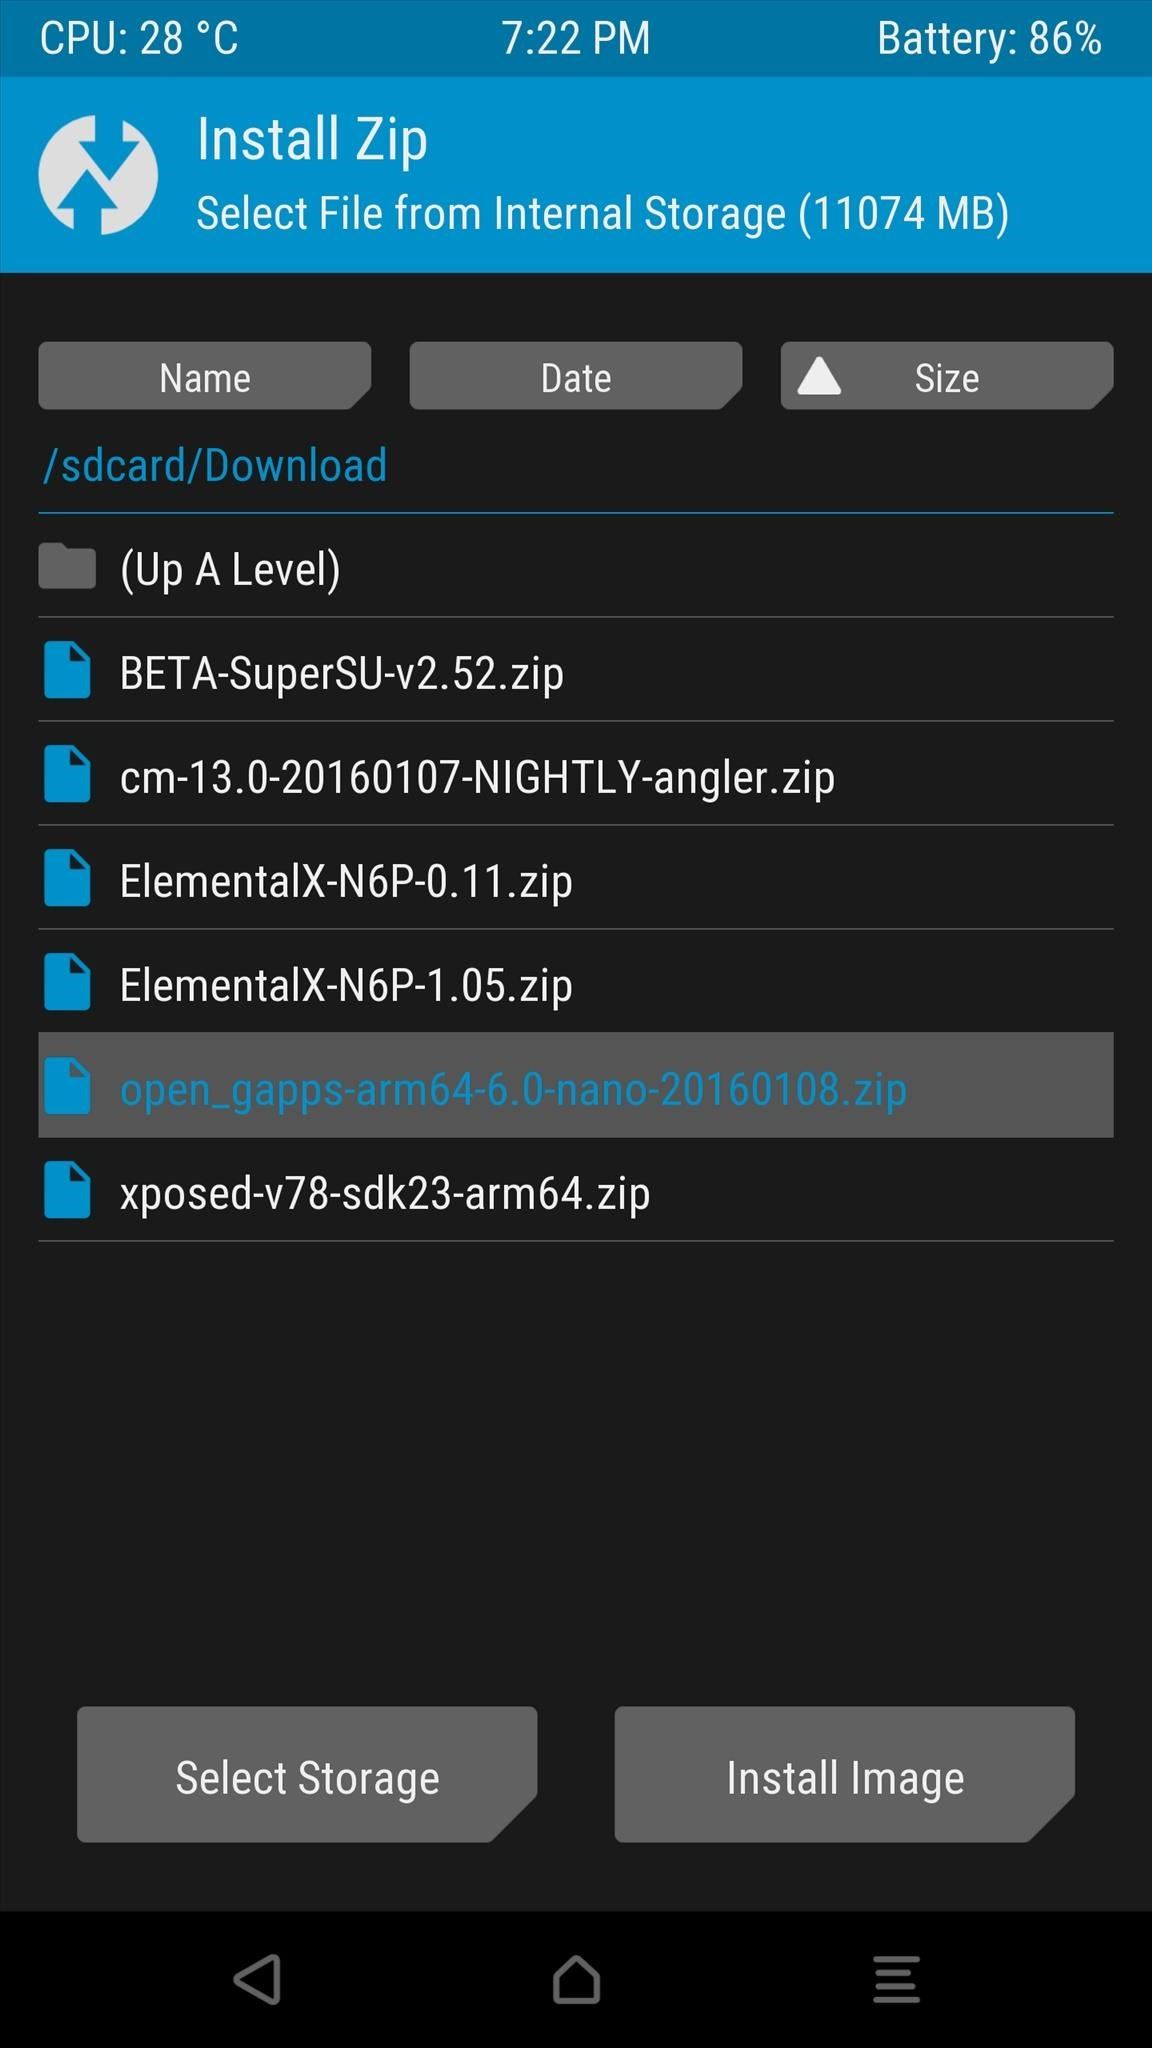
Step 7: Install the Proper Gapps Package (Recommended)If you opted to download a Gapps package to get all of Google's services and apps, now is the time to flash it. From the "Install Zip" menu, simply select your Gapps package, then swipe the slider at the bottom of the screen.From here, if you opted to download a custom kernel, tap the back button at the bottom of your screen. Otherwise, if you're simply flashing the ROM and Gapps packages, tap the "Reboot System" button at this time and skip ahead to Step 9 below.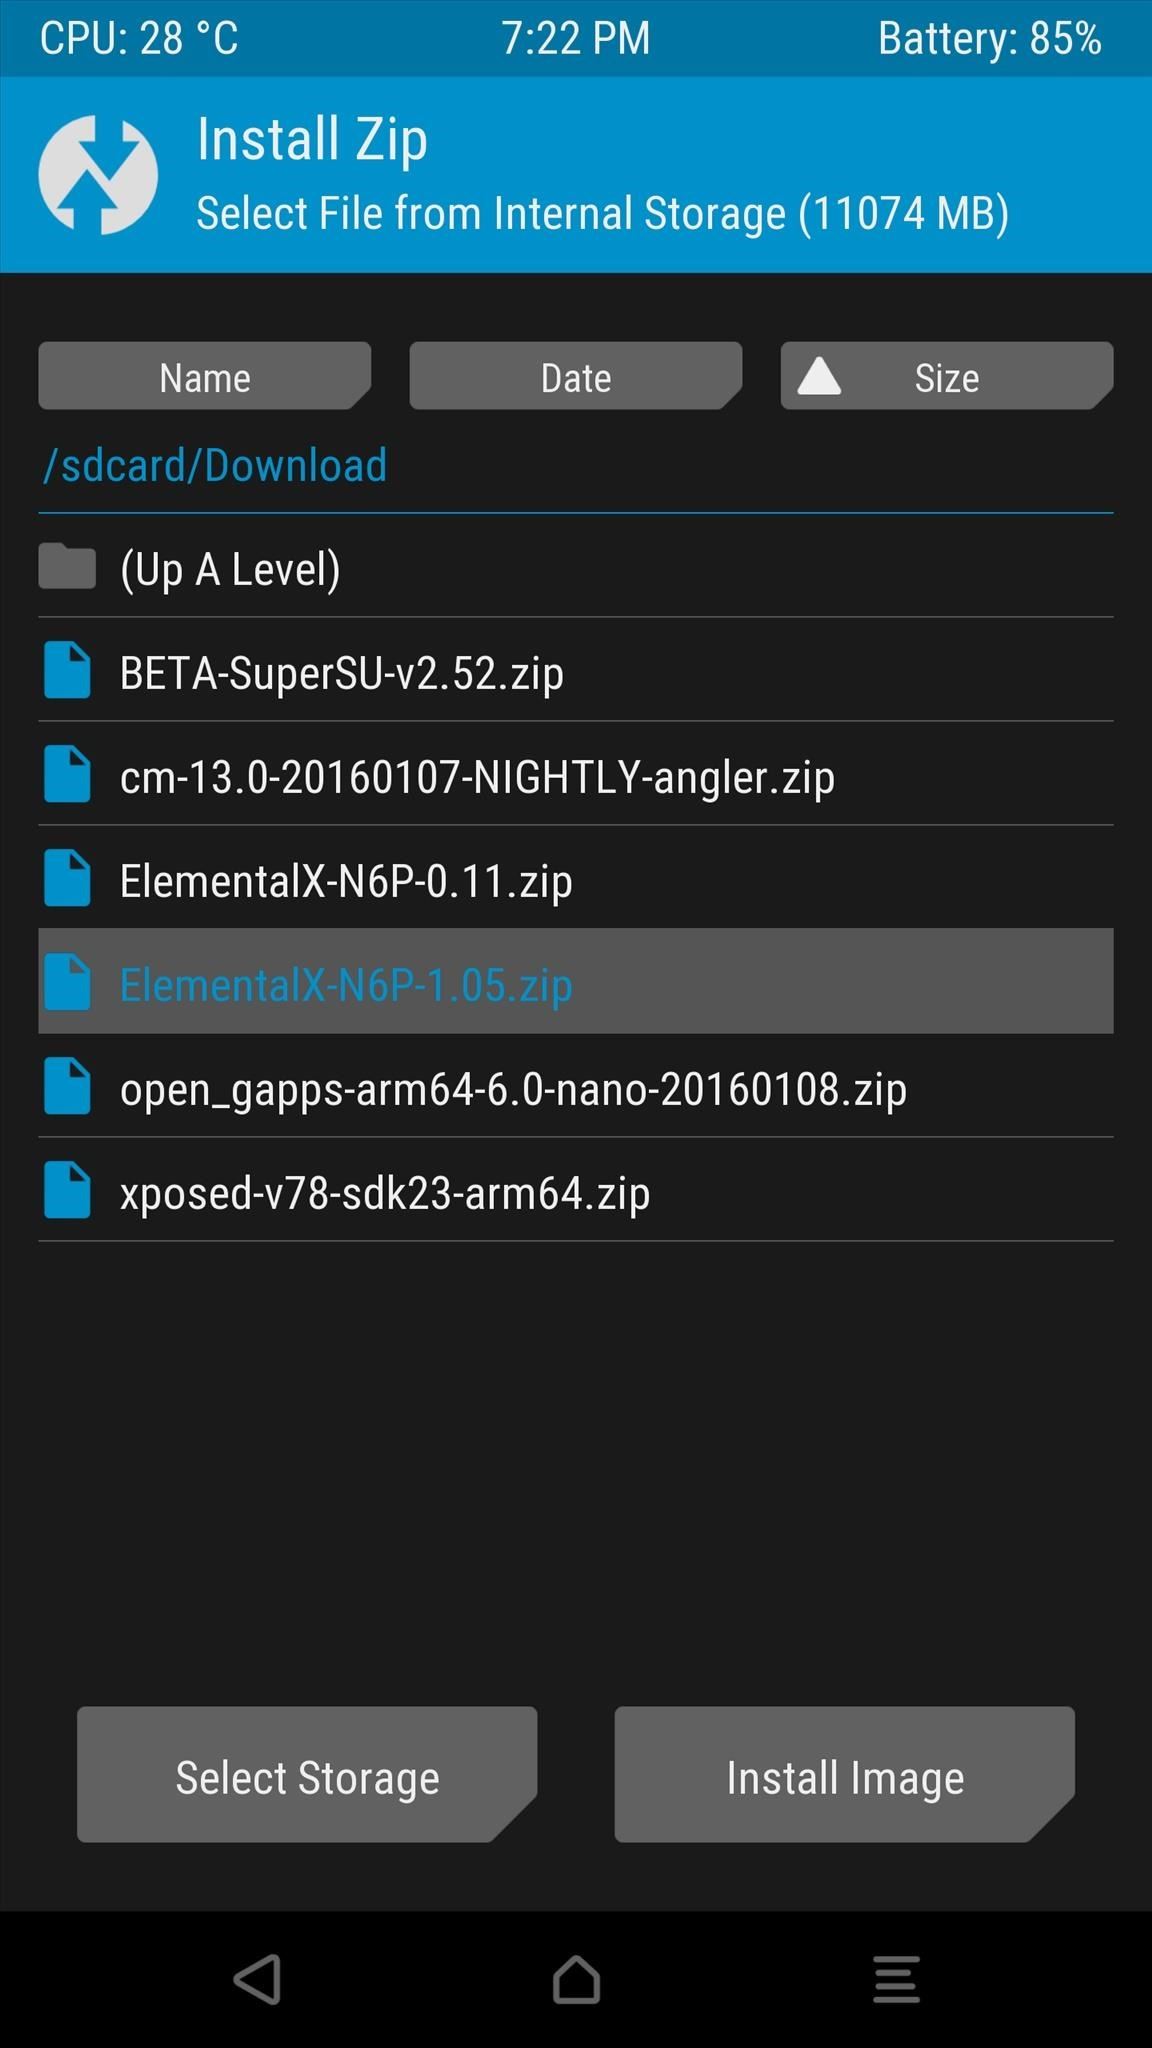
Step 8: Install a Custom Kernel (Optional)Finally, if you're installing a custom kernel today, simply select the ZIP file from TWRP's "Install Zip" menu. From here, swipe the slider at the bottom of the screen to install your custom kernel, then tap the "Reboot System" button when that's finished.
Step 9: Reboot & Enjoy Your ROMAfter flashing the custom ROM and any additional packages, your phone or tablet will take a lot longer than usual to boot up. This only applies to the first boot after installing a ROM, so don't worry about this being an ongoing issue, but know that it could take up to 15 minutes this first time.Once the device finishes booting, you'll be prompted to log into your Wi-Fi network and run through an initial setup process. But once you're done with that, you will be greeted by your new custom ROM. Almost all custom ROMs will come pre-rooted, so at this point, all that's left to do is explore the various settings menus and enjoy your new operating system. (1) CyanogenMod 13: Setup screen. (2) Home screen. What custom ROM did you go with? Did you flash the Gapps package and a custom kernel as well? Let us know in the comment section below.Don't Miss: More TWRP 101 Tutorials for All of Your Custom Recovery NeedsFollow Gadget Hacks on Facebook, Twitter, Google+, YouTube, and Instagram Follow WonderHowTo on Facebook, Twitter, Pinterest, and Google+
Cover image and screenshots by Dallas Thomas/Gadget Hacks
Click "Photos," then uncheck the folders you no longer want on your iPhone. Delete all of them at once by un-checking "sync photos from". When prompted, confirm that you want to delete the photos. If they are photos you took with the iPhone camera, open the Photos app on your iPhone, tap the photo, then tap the trash can.
3 Ways to Transfer Photos from iPhone to iPad - wikiHow
Click Show more, then make sure only the box labeled Location permissions is checked. Click Clear. You're good to go! Refresh this Yelp page and try your search again. You can also search near a city, place, or address instead.
Amp Event Professionals - Lake Zurich, IL - yelp.com
How To Get Windows 10's Live Tiles On Any Android Smartphone: Until now we have shared many articles on an Android operating system. We all know that Android is highly customizable where you can customize almost everything according to your need.
Get Windows 10 Live Tiles on Android thanks to SquareHome 2
Choosing The Best Police Flashlights. When choosing a police flashlight, always remember that not all of them are the same. That is why it is important to pick something that will work the way you want it to work. If you are usually out patrolling at night, then a flashlight with a high lumen would be beneficial.
$10 Police Flashlight Hack! - YouTube
Four Isn't Enough: How to Add an Extra Application to Your
News: Now You Can Share & Borrow Hearthstone Decks with Your Friends How To: Play "Kiss A Girl" by Keith Urban on acoustic guitar How To: Use the double undercut to control the bottom card How To: Do the Hindouble magic card trick
How to Make a "Shocking" Deck of Prank Playing Cards Packed
These phones were Touch screen, with all others features and accessories which iPhone consist of. 10 years back many companies such as Nokia, LG, Samsung and many more have launched many Touch Screen phones before Apple's iPhone. Here we will enlighten you some of the Touch Screen Phones Before iPhone: Nokia
8 features the iPhone X stole from Android - Android News and
Auto-Correction uses your keyboard dictionary to spellcheck words as you type, automatically correcting misspelled words for you. To use it, just type in a text field. To make sure that this setting is turned on, use these steps: Open the Settings app. Tap General > Keyboard. Turn on Auto-Correction. By default, Auto-Correction is on.
How to Disable Auto-Correct on iPhone Completely
osxdaily.com/2015/01/06/disable-auto-correct-ios/
If you're fed up with auto-correct on the iPhone erroneously changing words to things you did not intend to type, you can opt to disable the auto-correction feature completely in iOS. Doing away with this feature is not recommended for most users, but choosing to turn off autocorrect can be a
How to Turn off Autocorrect on iPhone or iPad | Digital Trends
Confirmed! Those of you who have been waiting (or dreading) the announcement of social games in Google+ can now look forward to them showing up in your stream. The anticipated games have yet to show up, but Google has confirmed that APIs will be made available for third party developers to access Google+, much like Facebook allows them.
WHAT IS GOOGLE'S NEST HUB MAX? | Daily Mail Online
If you find out your passwords have been compromised, you should change them immediately. Be sure to make a different password for every site and use a password manager to keep track of them all.
The Best Websites to Find out If You've Been Hacked | Digital
Be more productive with your iPhone/ iPad and iPod Touch, with easy customize option like change Font size and style in iOS 10, Released by apple in 2016. Not only static fonts at home screen or settings app. But also customize or set your dynamic default text on Mail app, Contact, Note, Phones
Change the font size on your iPhone, iPad, and iPod touch
0 comments:
Post a Comment